

Installation & Activation
Install ShapedCart like any other WordPress plugin. Once it's active, your side cart is already working.
Before you start
Make sure WooCommerce is installed and active first. ShapedCart is an add-on for WooCommerce and won't activate without it. Requirements lists everything else your site needs.
Install from WordPress.org
Installing ShapedCart from WordPress.org is the easiest way, and it means you'll get updates on your Dashboard → Updates screen like any other plugin.
- In your WordPress admin, go to Plugins → Add New Plugin.
- Type ShapedCart in the search box.
- Find ShapedCart – WooCommerce Side Cart, Mini Cart & Floating Cart by ShapedPlugin and click Install Now.
- When the button changes to Activate, click it.
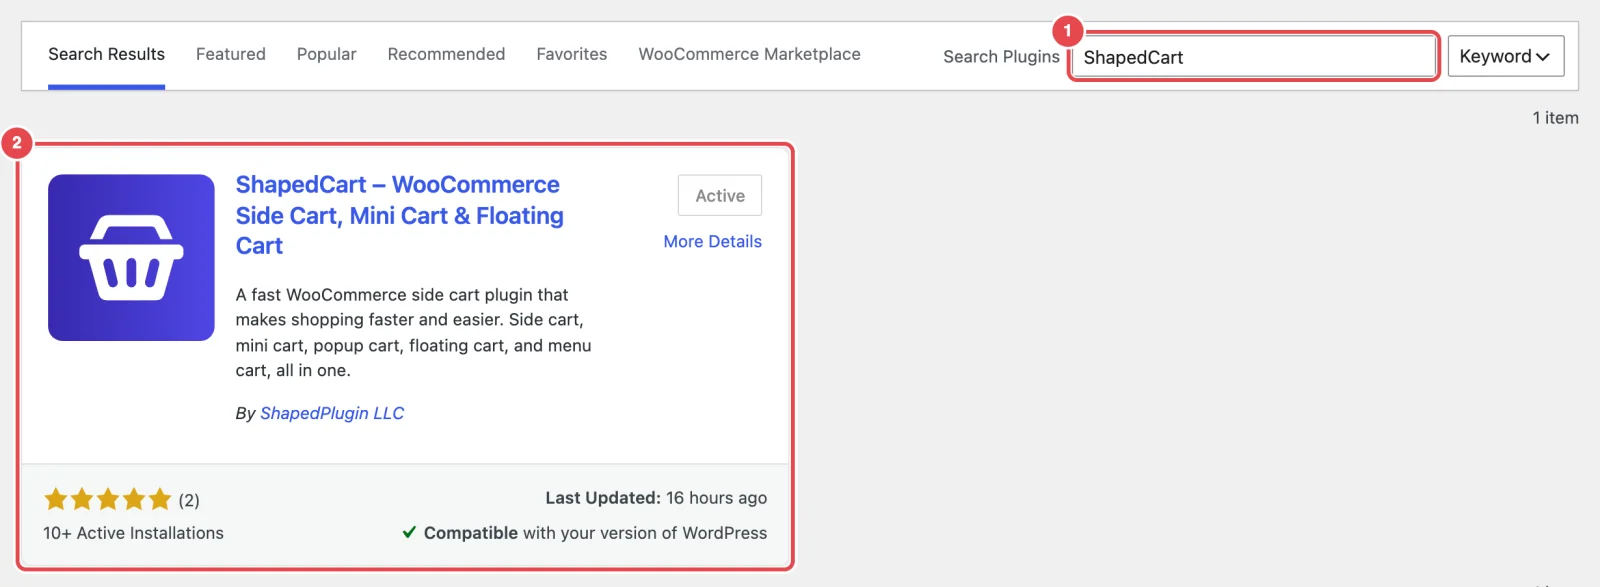
On your site the button on the card says Install Now. In the screenshot it says Active, because ShapedCart is already installed there.
That's it. Skip ahead to what happens when you activate.
Upload a zip file
Use this if you downloaded ShapedCart as a .zip file, for example to install a specific version.
- Go to Plugins → Add New Plugin and click Upload Plugin at the top.
- Click Choose File, pick the ShapedCart
.zipfile, and click Install Now. - Click Activate Plugin.
Don't unzip the file first. WordPress expects the .zip file itself.
Why is the folder called reno-cart?
ShapedCart used to be called RenoCart, and WordPress.org never changes a plugin's address once it's published. So the plugin folder, the zip file, and the WordPress.org page all still say reno-cart. That's expected, and it's how your site keeps receiving updates. RenoCart is now ShapedCart explains the rename.
Uploading by FTP or file manager
If you can't upload through the admin (some hosts limit upload sizes), unzip the file on your computer and upload the reno-cart folder into wp-content/plugins/ on your server. Then go to Plugins in your WordPress admin and click Activate under ShapedCart.
What happens when you activate
As soon as ShapedCart is active, it's working on your store. Nothing needs setting up first. You get these defaults:
| Feature | Default |
|---|---|
| Side cart | Slides in from the right |
| Auto-open | Opens every time a shopper adds a product |
| Floating cart | A button in the bottom-right corner with an item count. It's hidden on the cart and checkout pages. |
| Menu cart | Off until you turn it on |
| Coupon field | On, collapsed behind a "Got a discount code?" link |
| Cart summary | Subtotal and a "Shipping & taxes calculated at checkout" note |
To see it, open your shop in a new tab and add a product to the cart.
Deactivating keeps your settings
If you deactivate ShapedCart and activate it again later, your settings are still there. Activation only fills in defaults the first time. Deleting the plugin can remove your settings, but only if you've asked it to. See Uninstalling & Data.
Find the ShapedCart settings
ShapedCart adds its own ShapedCart item to the left-hand admin menu, next to the WooCommerce menu items. Click it to open the settings screen.
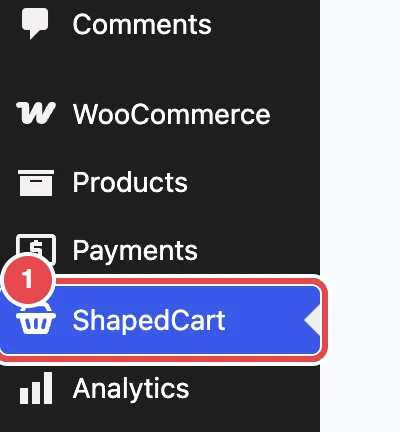
There's also a shortcut on the Plugins screen: click the Settings link under ShapedCart's name.

The Admin Screen Tour walks through everything on that screen.
Who can change the settings
Anyone with permission to manage WooCommerce can open the ShapedCart settings. On a standard site, that means Administrators and Shop Managers. Other roles don't see the menu item.
Updating
Update ShapedCart the same way as your other plugins: from Dashboard → Updates, or with the update now link on the Plugins screen. You can also turn on auto-updates for it there.
Your settings stay the same when you update. If a new version needs to change how settings are stored, it does that automatically the first time your site loads after the update. You don't have to do anything.
Multisite
On a multisite network, each site has its own ShapedCart settings. You can network-activate the plugin, but you still set it up separately on each site, from that site's own admin.
Related
- Quick Start: make the cart yours in about five minutes
- Admin Screen Tour
- Requirements
- Uninstalling & Data